English
 Deutsch
 Español
 Français
 Italiano
 日本語
日本語 Русский
 中文
中文
Design for 3D Printing: Wall Thickness, Overhangs, and Tolerances
- Published September 19 2026 - Updated September 19 2026
Practical design tips for choosing wall thickness, managing overhangs, and allowing the right clearance for functional 3D printed parts.
Design Tips by @ Sarah, with IN3DTEC production notes.
A model that looks perfect on screen can still fail on the print bed. Most of the time it's not a slicer problem — it's a design problem. Over the years I've reworked countless files where a small change to wall thickness, an overhang angle, or a tolerance gap was the difference between a clean print and a frustrating reprint. Here are the three areas I check first on almost every model that comes across my desk.
3D PRINTING WALL THICKNESS: HOW THICK SHOULD YOUR WALLS BE?
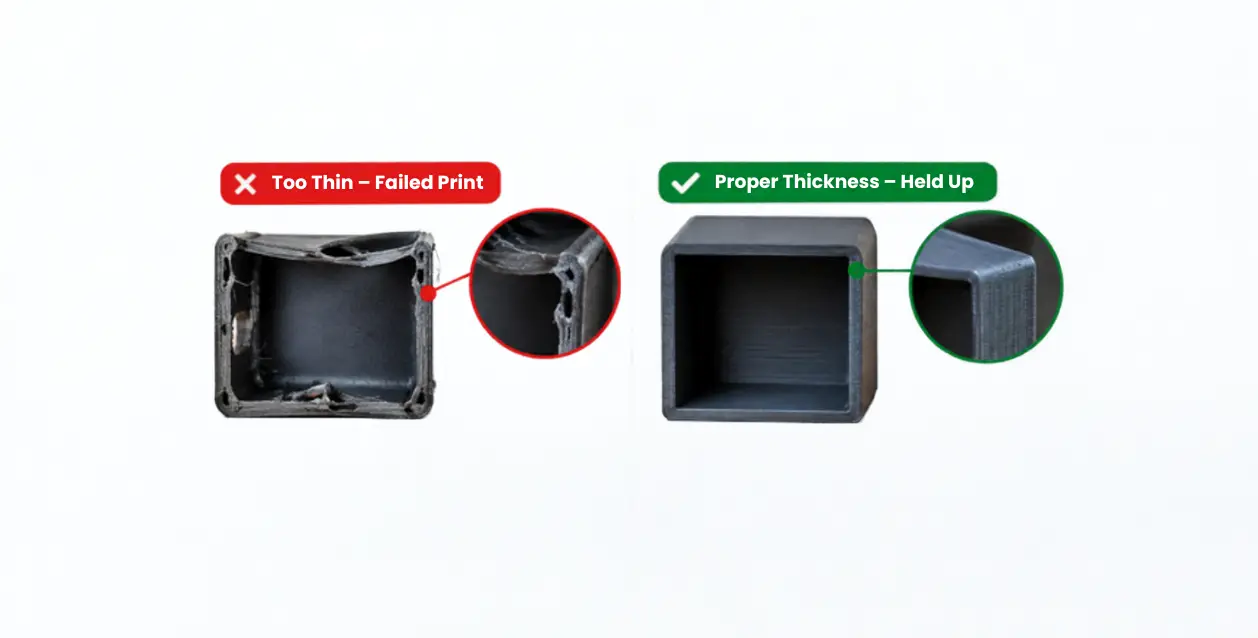
It's tempting to shave down wall thickness in 3D printing to save material and print time, but go too thin and you risk warping, weak points, or walls that simply don't register on the slicer at all. So, it's important to establish a practical minimum wall thickness for your chosen printer and material.
As a rule of thumb, keep functional walls at least 1.2–1.5mm thick for FDM prints with common materials like PLA (roughly 3–4 perimeter passes on a 0.4mm nozzle) and around 0.8–1mm for resin prints.
Thin ribs or decorative details can go thinner, but anything load-bearing should be sized around your printer's nozzle diameter and layer strategy not just what looks good in the CAD viewport. If a wall is too thin for your chosen printer or material, the simplest solution is usually to increase its thickness before printing.
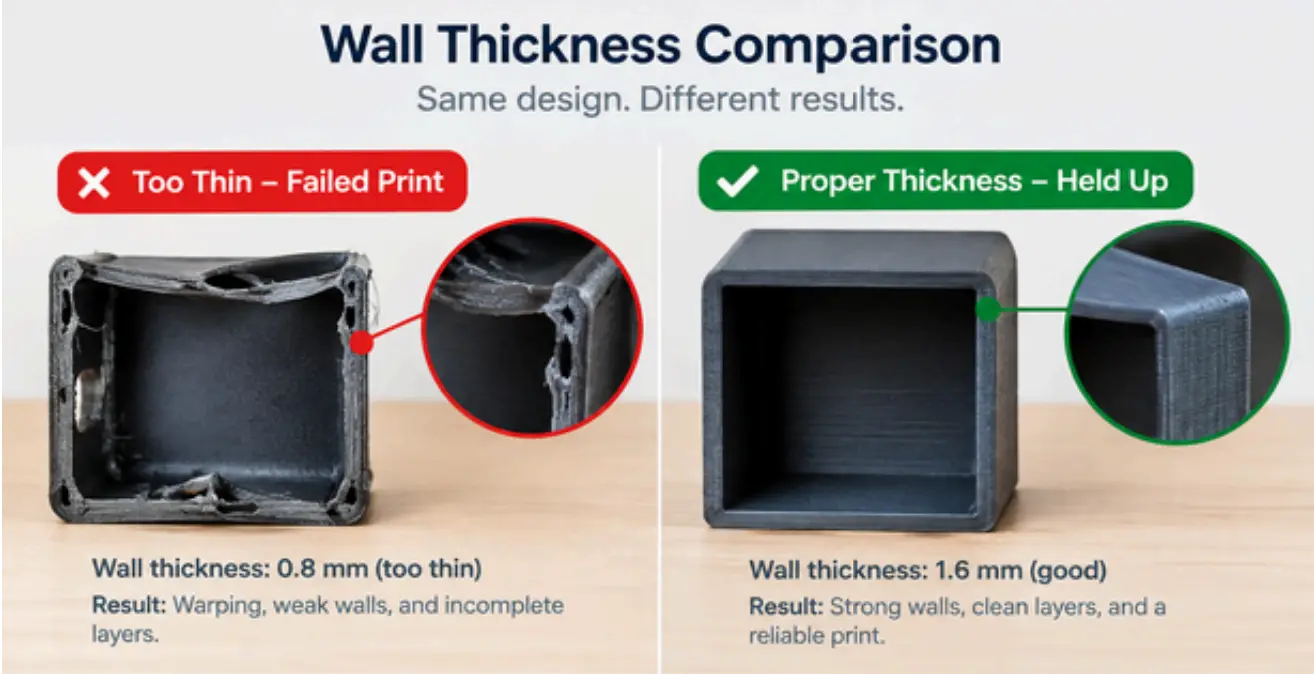
3D Printing Wall Thickness Comparison
Comparing different wall thicknesses shows how a thicker wall can improve printability and reduce the risk of warping or incomplete extrusion.
Image Source: Sarah
Wall thickness also varies significantly between 3D printing technologies. For more detailed recommendations by process, see our guide to👉 How to Design Wall Thickness for 3D Printing
3D PRINTING OVERHANGS: HOW MUCH CAN YOU PRINT WITHOUT SUPPORTS?
FDM printers can typically handle overhangs up to about 45° from vertical without support. Push past that and you'll start seeing drooping, stringing, or layers that never quite bond. When a design calls for a steeper overhang, I look at three options before reaching for supports: reorienting the part on the bed, adding a small fillet or chamfer to ease the transition, or splitting the model and joining the pieces after printing. Supports work, but they cost material, print time, and post-processing — and they leave a surface finish you often have to clean up by hand. Designing around the overhang, when possible, saves that step entirely.
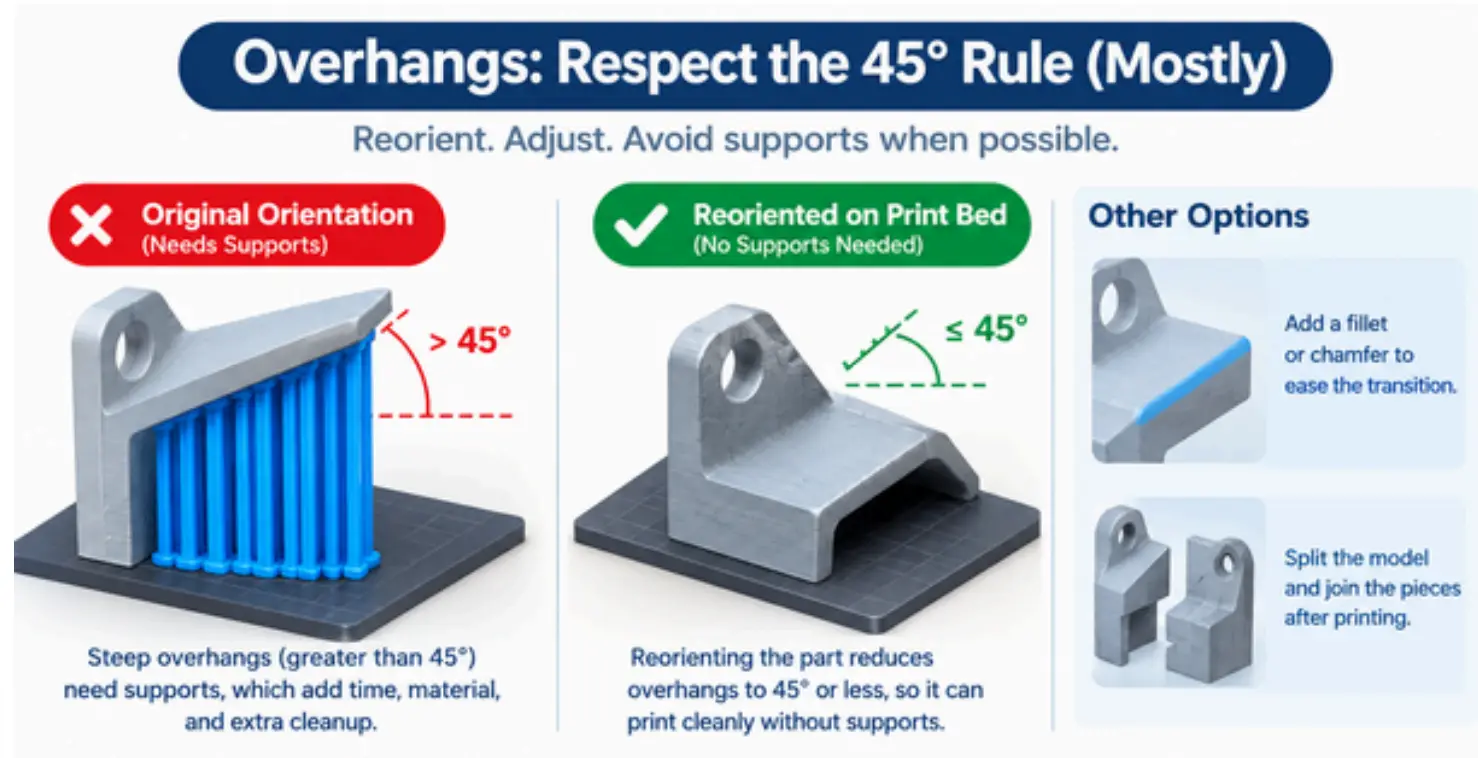
3D Printing Overhangs and the 45-Degree Rule
Reorienting a model to reduce overhang angles can help minimize the need for support structures, reducing print time and post-processing.
Image Source: Sarah
3D PRINTING TOLERANCES: HOW MUCH CLEARANCE DO YOU NEED?
Tolerance describes how much a printed dimension can vary from the intended dimension, while clearance is the intentional gap between mating parts. Two parts that are meant to fit together — a snap-fit lid, a shaft in a bearing, a peg in a hole — almost never print at the exact dimensions in the CAD file. FDM parts typically shrink slightly and holes tend to print undersized, while resin parts can shrink further during curing. My starting point is usually a 0.15–0.3mm clearance per side for a snug FDM fit. Before committing to a full assembly, print a small tolerance test with the same material and settings. This lets you check how the actual printer handles the fit instead of relying only on the CAD dimensions. It's a five-minute print that saves hours of resizing later.
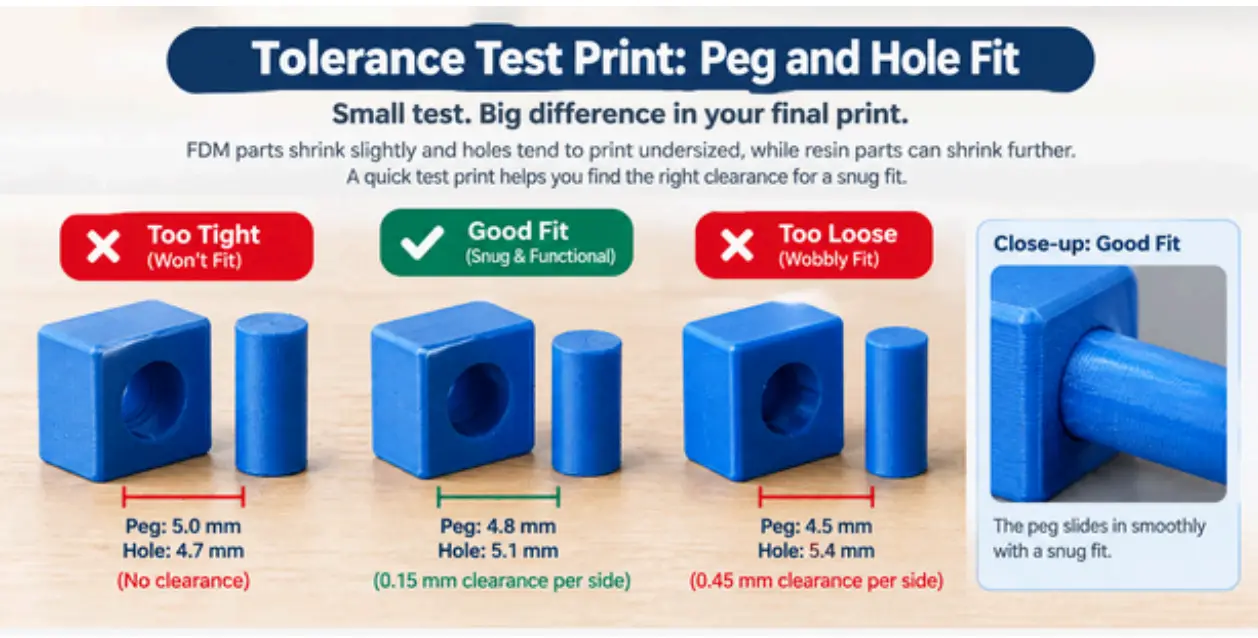
3D Printing Tolerance Test and Clearance Guide
A peg-and-hole tolerance test helps identify the right clearance for a snug, functional 3D printed assembly.
Image Source: Sarah
BRINGING IT TOGETHER
None of these rules are absolute — every printer, material, and part geometry behaves a little differently. But checking wall thickness, overhang angles, and tolerance allowances before you slice catches the majority of printability issues before they cost you a failed print. When in doubt, a quick test print of the trickiest feature is always cheaper than finding out after a multi-hour full print fails.