English
 Deutsch
 Español
 Français
 Italiano
 日本語
日本語 Русский
 中文
中文
Unveiling the Must-Know Essential Features of Cura Slicer
- Published November 06 2025 - Updated September 29 2026
Let’s explore the essential functions of Cura Slicer.
Cura is a widely used slicing software in the 3D printing that helps you pre-process 3D models for printing. It offers rich functions and settings designed to optimize the printing process and achieve the best print results. In this blog, we'll explore some of the core features of Cura that you need to know.
1. MACHINE SETTINGS: START-GCODE & END-GCODE
Each 3D printer has different build sizes, zeroing methods, and optimal retraction parameters. Properly setting the nozzle's start and end points helps control filament extrusion and prevents scratches after printing. You can consult your 3D printer manufacturer for these parameters and then import them directly.
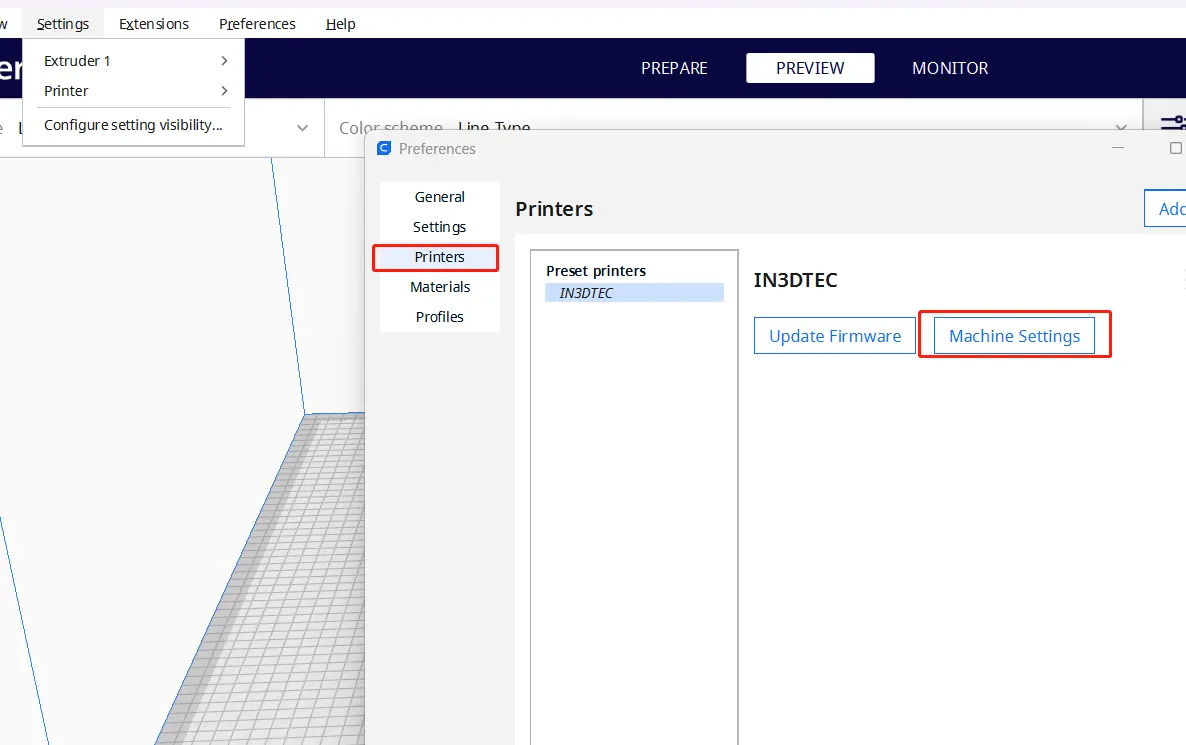
Cura printer settings interface showing the Printers section and Machine Settings option for configuring a 3D printer.
2. QUALITY
In Cura, the quality settings refer to a set of parameters that allow you to fine-tune the print quality of your 3D printed parts. Layer thickness directly affects the appearance of the printed part. The thinner the layer, the longer the printing time, the smoother the surface, and the higher the quality. A larger initial linewidth value reduces the need for platform leveling and makes printing easier.
3. PREFERENCES: EXPERT, BASIC, ADVANCED
For beginners, we do not recommend using expert mode. Advanced mode is a good starting point and is sufficient for most materials such as ABS, PLA, and PETG.
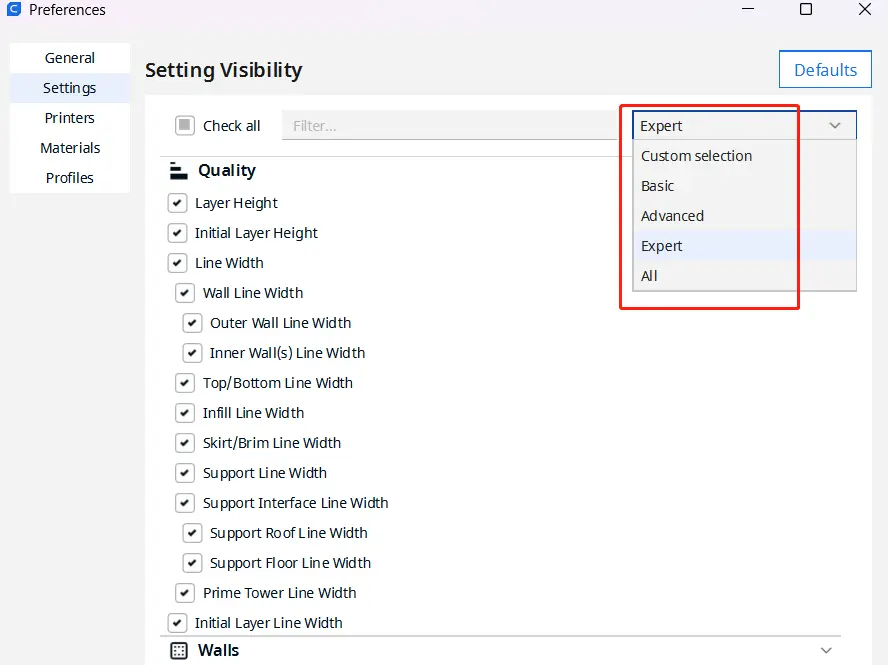
Cura Setting Visibility menu showing different configuration levels, including Basic, Advanced, Expert, and All settings.
4. WALLS
Wall layer line count: If the "quality" setting determines the appearance of the sample, then the "wall layer" setting has a significant impact on the sample's strength. Simply put, for non-solid printed samples, the higher the wall layer line count, the more robust the sample. For most printed parts, 3 line counts are sufficient.
Z seam alignment: The last thing we want to see is a seam line on the surface of the printed part, which is a defect for 3D printed parts with high appearance requirements. This line is actually the starting point of the print. While it cannot be completely avoided, its position can at least be adjusted to hide it inside, in a corner, or elsewhere. This can also be improved by increasing the retraction amount and speed.
5. PRINTING SPEED
First layer print speed: The first layer must be printed at a slower speed. Do not rush it. Most part failures occur on the first layer, as the stability of the prototype and print platform is crucial. A slower print speed allows the user to identify and adjust problems promptly. Once the first layer is printed, you can relax and enjoy a cup of coffee.
Other speeds: Printing speeds vary between different 3D printers, primarily due to mechanical factors such as the motor, lead screw, and motherboard. Please consult the 3D printing equipment manufacturer before making any adjustments.
6.SUPPORT STRUCTURES
Support Blocker: Mastering how to use Cura's support structure generator is crucial. It helps users cut down on extra support structures, lower costs, and optimize print quality.
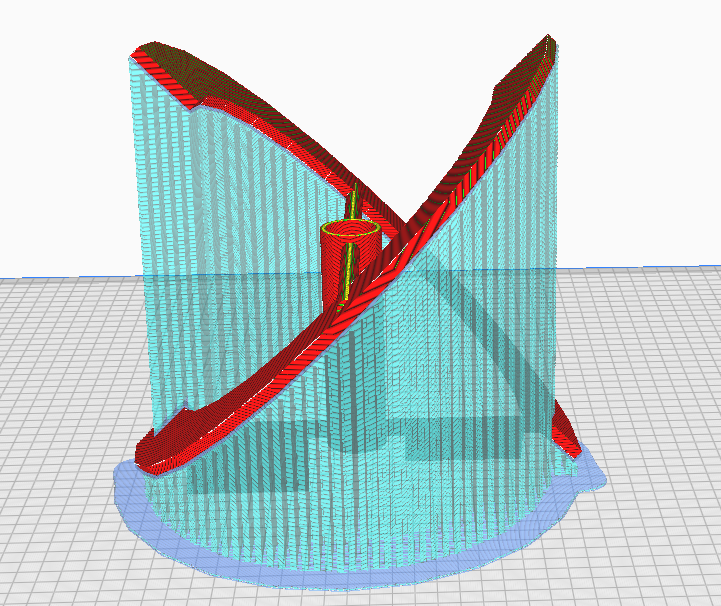
Support Patterns: When printing complex models or designs with overhangs, support structures are crucial for ensuring successful printing. Cura offers a variety of support patterns that provide stability during printing and can be easily removed after printing. Therefore, it's important to understand which support type is best suited for your 3D printed parts.
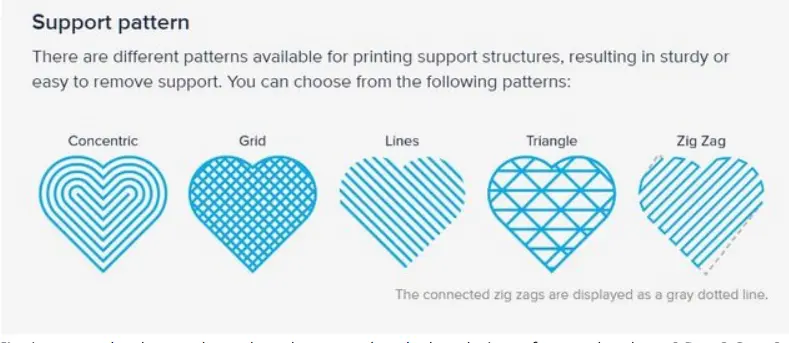
Cura support pattern options for 3D printing, including Concentric, Grid, Lines, Triangle, and Zig Zag patterns.
7. INFILL MODE & DENSITY
Infill Patterns: Cura offers a variety of patterns for filling internal spaces, such as grids, lines, triangles, and zigzags. Each pattern has its own unique characteristics in terms of strength, flexibility, and printing time.
Infill Density: This setting determines the amount of infill material used to fill the object. It is usually expressed as a percentage. The higher the percentage, the denser the internal structure and the greater the strength. A lower percentage can reduce material usage and printing time but may sacrifice strength.
Infill Line Distance: This setting defines the distance between each fill line. A smaller spacing results in a denser fill, a larger spacing reduces printing time and material consumption. For best results, please adjust this setting according to the nozzle size and layer height.
8. TRAVEL
Retraction: There are two important parameters for retraction. They are retraction speed and retraction distance. Proper retraction settings can reduce post-printing processing time. If the retraction distance is set too low, excessive material seepage may cause stringing or small spots on the printed surface. If the retraction distance is set too high, the material may not flow smoothly, resulting in holes due to insufficient material. Specific values depend on the length of the extrusion module. Please consult your 3D printer manufacturer. Retraction speed is relatively easy to understand: too high a speed can cause filament breakage, while too low a speed may cause material overflow.
Travel speed: Travel speed refers to the speed at which the print head moves during the retraction process. The specific value usually depends on the quality of the motor equipped in the printing equipment. Sometimes, even if the axis moves smoothly, you may still hear abnormal noises from the 3D printer. This is usually due to improper retraction speed settings. It is recommended to consult the 3D printer manufacturer for advice.
9. COOLING SPEED
Cooling rate depends on the material. It's important to note that not all materials require a cooling rate setting, such as ULTEM, PPSF, ABS, and PC. However, an appropriate cooling rate can optimize the surface smoothness of the printed parts.
10. BUILD PLATE ADHESION
Brim: Brim is ideal for common plastics: PLA, PETG, ABS
Raft: It is strongly recommended to use a base plate when printing very large ABS, PC, or high-performance plastics such as PEEK, ULTEM, PPS, PPSF, and PC-ABS. The most crucial aspect is properly controlling the distance between the printed object and the base plate. This avoids both excessive distance leading to separation during printing and insufficient distance resulting in the object being unable to separate after printing. There is no precise numerical standard for this. Therefore, the appropriate distance needs to be found through trial and error.